A full or partial re-wire of a house is a long, noisy and mucky business, and is best conducted while the house is empty. In addition, plastering is very definitely not within my skill-set, so you will need to find a plasterer to fill the various holes and channels that the re-wiring process leaves in your walls (and sometimes ceilings)
Sadly, it is not a process that lends itself well to photographs, but here are a few before/after shots:
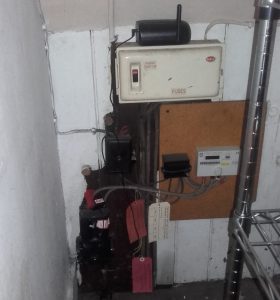
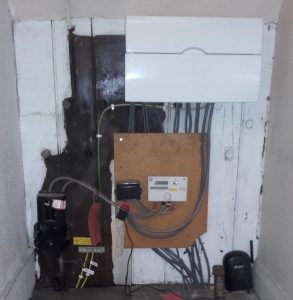
Starting with the fusebox – an old model with re-wirable fuses and a separate little box for the lighting circuit was replaced with one modern fusebox with RCD protection. The earthing has also been brought up to regulation standard, with a new earth bar (where the yellow sticker is at the bottom left), appropriately-sized earthing wire to connect the parts of the system and earth bonding to the gas and water pipes. As this fusebox is mounted at the rear of the understairs cupboard, I installed a cupboard light on its own separate circuit which was not linked to an RCD – that way if a lighting fuse or an RCD trips the homeowner will still have a light to see the fusebox and reset the fuses / RCD.
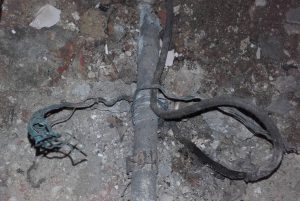
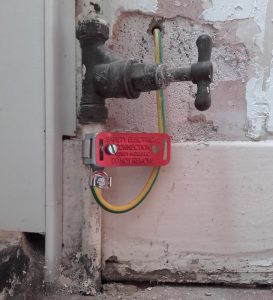
Next we have the earth bonding to the water pipe – as you can just about see the original bonding had been secured to the pipe under the floorboards by wrapping some wire around them… and that water pipe had, at some point in the past, been disconnected. The gas was entirely without any earth bonding. The ‘after’ picture shows the new bond – just before the stopcock, and above the floor so accessible (as per regulations). The wire then heads back to the earth bar at the fusebox. It is not clear from the picture, but I did scrape the paint from the pipe where the bonding clamp is fixed to ensure a good connection (verified by testing).
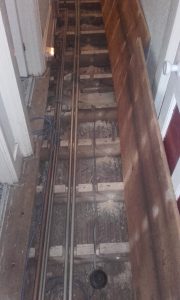
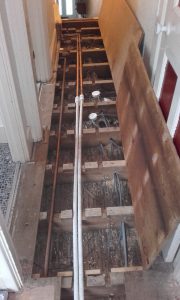
This is a view under the floorboards in the upstairs hallway. The left-hand picture shows the original wiring – one power circuit which serviced the kitchen, back bedroom and boiler, and one lighting circuit for the downstairs lights (the coiled wire). These cables ran along notches in the rafters which is not ideal, and the lighting wire actually ran alongside the water pipes which is strictly forbidden. the right-hand picture shows the new wiring – a new ring main for the upstairs bedrooms, a circuit for the kitchen, a circuit for the cooker, and circuit for the boiler and a circuit for the downstairs lights. All are run through holes drilled in the middle of the rafters, as recommended in the regulations. The white discs are junction boxes within the lighting circuit. As you might notice, the plumbers have also been busy
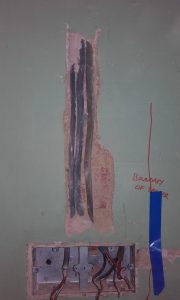
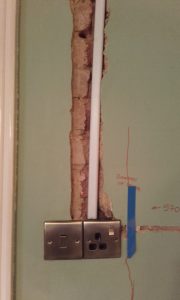
This is an example of what you might find during a rewire – the left-hand picture shows the original wiring to the socket, which has been held in place with nails and plastered directly into the wall. The right-hand picture shows the new wiring, neatly enclosed in conduit and awaiting the plasterer.
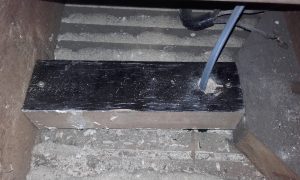
A couple of bonuses from doing a rewire – you can add noggins into the ceiling for strength where the light fixtures will attach
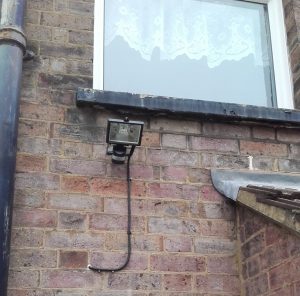
and you can add extras, like this outside light
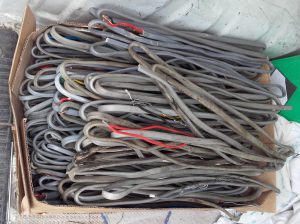
And finally, here is a sample of the old, defunct cable that was removed from a house